Top 10 South American Mountaineering Destinations
South America is a land of superlatives.
The wettest place on Earth – López de Micay – is located in southwestern Colombia and receives an average of 315 days of rainfall each year. Just a few thousand kilometres to the south, the Atacama Desert claims the title of the driest non-polar region in the world, with some areas reporting no rainfall at all since records began.
Meanwhile, the Amazon River is the largest in the world by volume and the surrounding basin is home to the world’s largest rainforest. A few hundred kilometres north, in Venezuela, Angel Falls is Earth’s tallest waterfall.
However, the continent’s (arguably) most famous superlative landform is the one that also helped to create and define all of the others: the Andes Mountains.
Running for roughly 7,000 kilometres (4,350 miles) from the tropical coastline of northwestern Venezuela to the rugged, subpolar tip of Tierra del Fuego, the Andes is the longest mountain chain on earth.
Formed by the subduction of the Nazca plate beneath the South American plate on the western edge of the continent, the Andes are home to the world’s tallest mountains outside of Asia and many incredible mountaineering destinations.
From technical and challenging ascents up sheer walls of ice and rock to smaller peaks ideally suited for first-time climbers, the Andes boast a range of options for mountaineers of every level and predilection.
Modest peaks from Ecuador to Argentina serve as the perfect spot for people looking to learn all the necessary skills to become a mountaineer. Meanwhile, intermediate-level peaks throughout the range serve as excellent training grounds for more challenging ascents in Alaska and the Himalayas.
The Andes also boats plenty of peaks that are worthy challenges in their own right. From coping with incredibly high altitudes to making long and technical rock, ice and snow climbing ascents, there is no shortage of challenges, even for the most experienced climbers.
Below, we’ve taken the time to share some essential tips and advice for preparing for any mountaineering expedition and listed 10 of the top climbing destinations in South America. Enjoy!
Preparation and training
Mountaineering is both a fun and rewarding sport, but it is also a challenging one. Along with being an excellent source of physical exercise and other providing health benefits, mountaineering can also be a mental challenge.
As a result, it is essential to be mentally and physically prepared before heading out into the mountains. Most guides recommend spending between two and six months of physical training before heading out on an expedition. This physical training can be broken down into four separate components: climbing conditioning, strength training, cardiovascular training and flexibility training.
- Climbing conditioning is one of the most important aspects of mountaineering. It works out all the muscles needed to hike uphill carrying a pack that may weigh anywhere between 15 and 30 kilograms (33 to 66 lbs). The best way to practice climbing conditioning is to hike in the mountains or carry a weighted pack up a stair machine. (However, this second option is far worse for the ankles and knees, climbing conditioning in the mountains, if possible, is always the better option.)
- Strength training for mountaineers usually focuses on the lower body and core, with some back and shoulder work. Most guides recommend finding a training regime that incorporates crunches and squats in the months leading up to the trip.
- Cardiovascular training for mountaineers involves both aerobic and anaerobic exercises, with the goal being to increase lung capacity and strengthen the heart. Along with climbing conditioning, cardiovascular training is critical and beneficial when climbing at high altitude.
- Flexibility training is key to climbing. Both before and after engaging in any of the aforementioned exercises, it is important to stretch. This will help prevent muscle injuries during physical exertion and give you a greater range of motion, all of which will come in handy on exposed mountain ridges and glaciers.
Away from the physical side of the sport, it is also vital to be mentally prepared for the challenges that will come up while climbing. Among these are the elevation and climate conditions.
Even at reasonably modest elevations – as low as 2,400 metres (8,000 feet) – the air becomes substantially less saturated with oxygen (thinner) and breathing becomes more difficult.
Taking up yoga and practicing breathing exercises is a great way to mentally prepare you to exert increasingly more effort as elevation is gained while simultaneously bringing less oxygen into the lungs with each breath.
It is also important to be prepared to deal with inclement weather. Many of the country’s mountain ranges create specific climate zones and are subject to rapidly changing conditions. From Tierra del Fuego to la Avenida de los Volcanes, clear days can quickly turn into violent storms.
As a result, always plan for worst-case scenario weather conditions. This means bringing the proper clothing and gear and going over various route finding and navigation skills before the ascent.
It is also always best to climb with a certified mountain guide who will help make the best decision and know when turning back is the only safe option.
What to bring on a mountaineering expedition
Along with the physical and mental preparation for a mountaineering experience, it is also important to bring the correct gear. Having the proper equipment can be the difference between success and failure.
While equipment lists will change based on the mountain and the guide service, below is a checklist of essential mountaineering gear required on most intermediate and advanced ascents.
Climbing and camping gear
- 20 to 60-litre climbing pack
- Ice axe
- Crampons
- Carabiners
- Belay device
- Climbing harness
- Rope
- Avalanche rescue gear
- Crevasse rescue gear
- Headlamp and extra batteries
- Four-season tent
- Thermal sleeping bag
- Sleeping pad
- First aid and toiletries
- ID card, visas and necessary permits
Footwear
- Gaiters
- Hiking socks and liner socks
- Mountaineering boots
- Street shoes or sandals for base camp
Headwear
- Neck gaiter and balaclava
- Mountaineering goggles
- Mountaineering helmet
- Knit cap
- Category 4 sunglasses (for snowy conditions)
- Sunhat
Clothing
- Baselayer bottom and top
- Softshell pants and hardshell pants
- Softshell jacket, midlayer top and hardshell jacket
- Lightweight insulated jacket
- Insulated down parka
- T-shirts, shorts and trousers for base camp
- Nightwear and underwear (long underwear is preferable for camping on mountains)
- Liner gloves and mountaineering gloves
Eating and drinking
- One-litre water bottle
- Water purification tablets and/or steripens
- Backpacking stove and fuel
- Cooking and eating utensils
- Energy snacks
- Hot drink mix
- Collapsible water container
- Thermos
- Biodegradable soap
Remember, some guides will provide some or all of the necessary equipment, while others will not. It is always best to ask the guide for a checklist before packing for an expedition.
1| Aconcagua
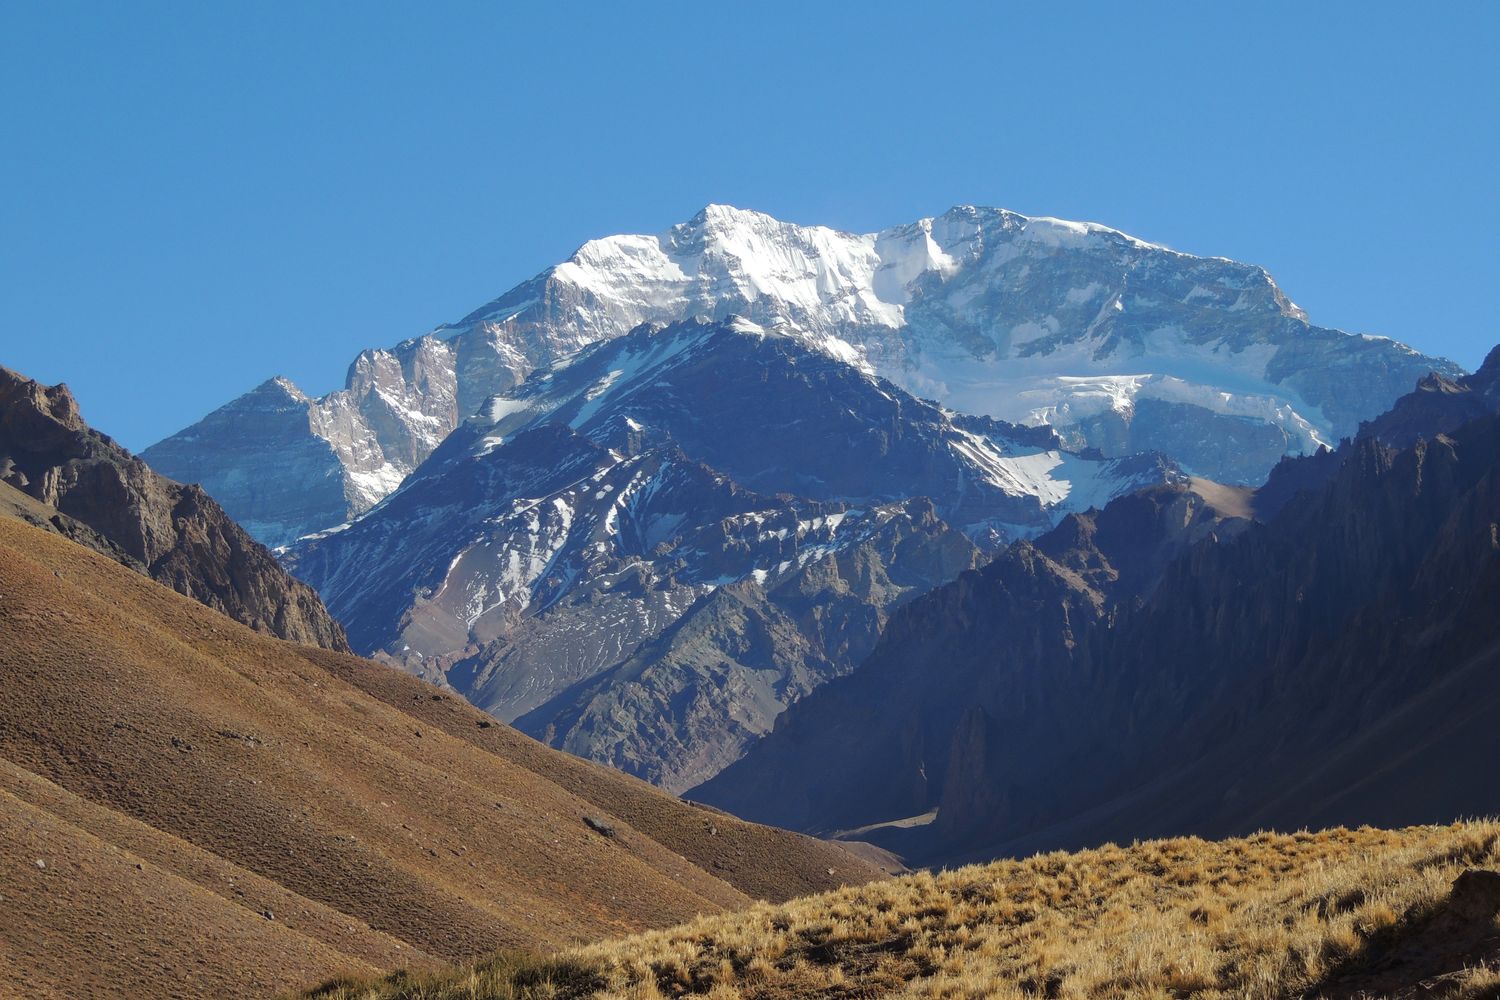
Towering above the snow-capped peaks of Argentina’s Principal Cordillera, Aconcagua holds the unique distinction of being the tallest mountain in both the southern and western hemispheres.
In fact, with an elevation of nearly 7,000 metres (23,000 feet), Aconcagua is the second-highest of the world’s Seven Summits and the tallest mountain outside of Asia.
Despite its immense size, Aconcagua is widely considered one of the easiest of the Seven Summits to climb. The most straightforward route to the top requires no technical climbing skills.
Combined with its convenient location – a bit more than 100 kilometres (62 miles) away from Mendoza – Aconcagua has become one of South America’s premier climbing destinations. An estimated 3,500 mountaineers flock to the peak each summer.
Despite its relative ease (compared with the rest of the Seven Summits), only an estimated 30 to 40 percent of climbers successfully make it to the top.
Challenges of climbing Aconcagua
The immense elevation, prominence and climate of Aconcagua serve as the main challenges for climbers seeking to reach the summit.
At the top of the peak atmospheric pressure is 40 percent of what it is at sea level. As a result, altitude sickness is one of the main challenges. This is compounded by the immense elevation differential of Aconcagua, which is the second most prominent peak in the world.
As a result, climbers need to acclimate appropriately before heading to the summit. Most guides do this with the climb high, sleep low method, and spend the first two weeks of an ascent slowly heading up and down the mountain.
Away from the elevation, the climate is another major challenge. At higher altitudes, temperatures are frequently below freezing with high winds. Bringing the proper gear and layers is important to ward off cold weather injuries, which are not uncommon among unprepared climbers.
How to get to Aconcagua
Aconcagua is located about 112 kilometres (70 miles) northwest of Mendoza. Most trips to climb the peak begin with a flight into Governor Francisco Gabrielli International Airport (MDZ). Most guides will opt to meet here and provide transport to the start of the trip.
Routes to the summit of Aconcagua
Overall, three main routes lead up to the summit of Aconcagua. Of these, the normal route is the easiest, and therefore, the most popular. The Polish Glacier Traverse and Polish Glacier routes, both of which are more technical, are the others.
The normal route starts from the north of the mountain and follows the northeast ridgeline to the summit. Five main camps are set up along the way, which help climbers acclimate and pace themselves to the top.
For more advanced climbers, the Polish Glacier Traverse route is also quite popular. Starting from the Vacas valley, the route crosses the far steeper southern face of the mountain and requires a mix of technical snow, ice and rock climbing.
Some climbers also opt to head straight up the southern face, where the Polish Glacier is. While this is the most direct route, it is also the most physically and technically challenging.
Quick facts:
- Location: Argentina
- Elevation: 6,961 m (22,837 ft)
- Duration: 3 weeks
- Climbing season: November to March
2| Ojos del Salado
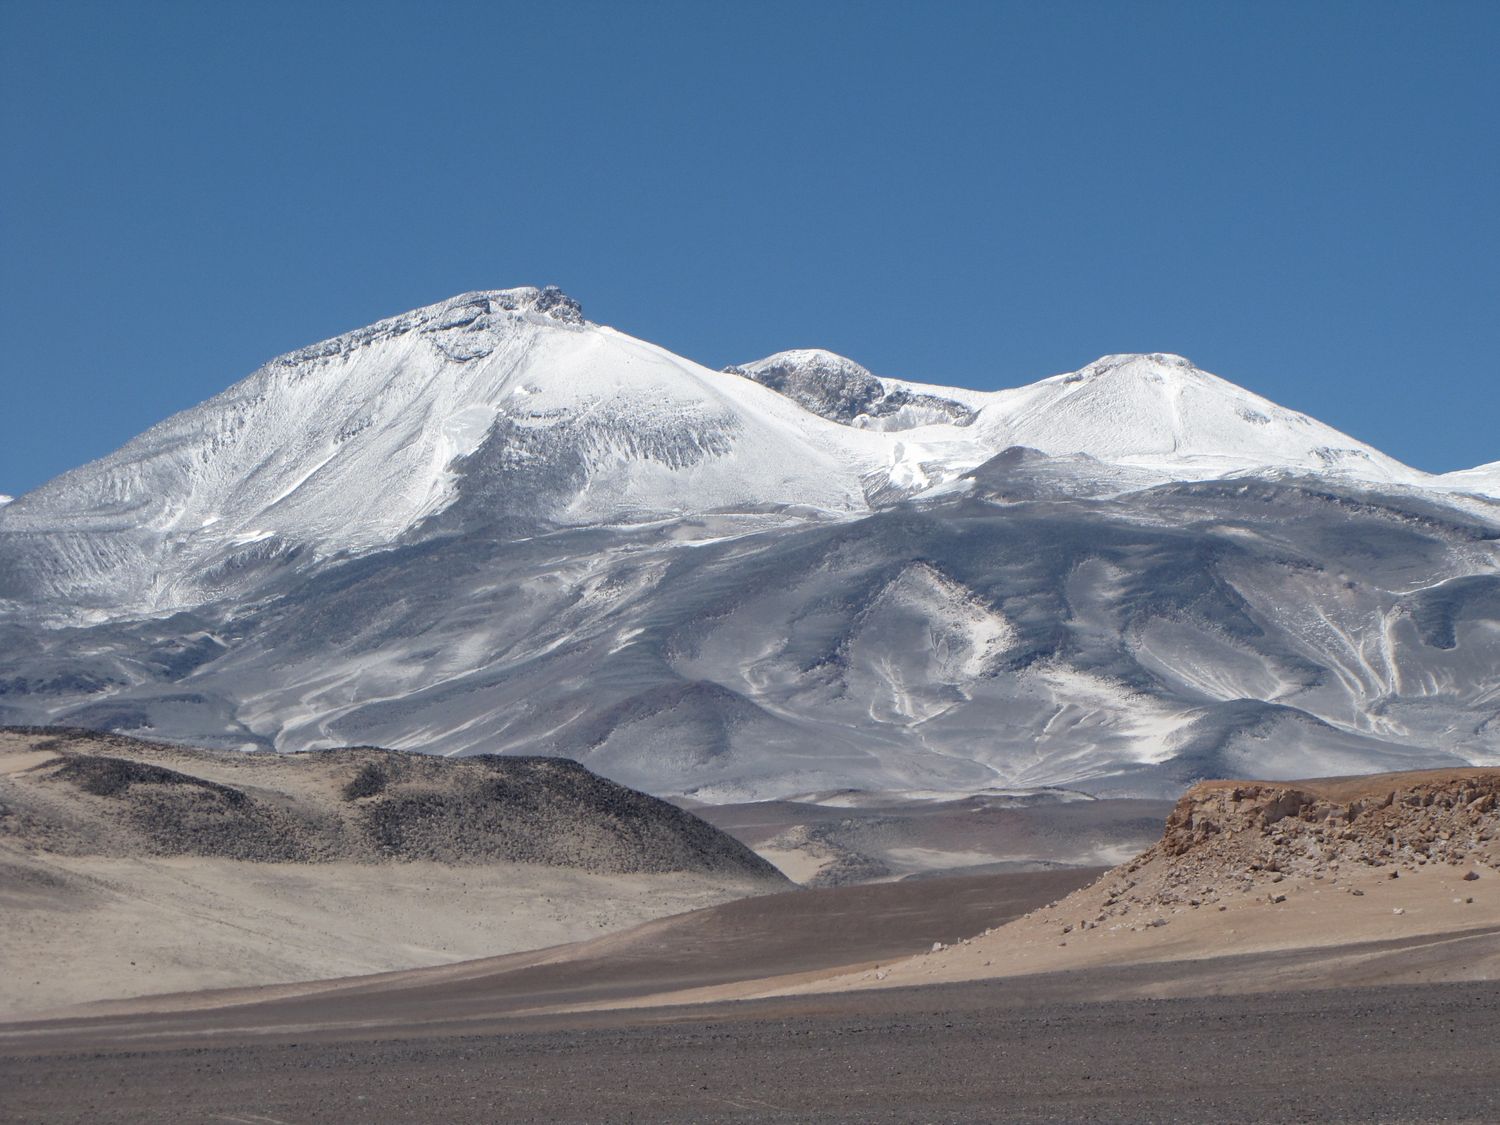
Towering over the eastern edge of the Atacama Desert, Ojos del Salado is a massive volcano. With just 68 metres (197 feet) standing between its summit and the top of Aconcagua, Ojos del Salado is the second highest peak in South America.
Along with being one of the world’s Seven Second Summits, the active stratovolcano is also the second-highest mountain outside of Asia. As a result, it is a popular climbing destination for intermediate-level mountaineers looking for their first high-elevation experience.
Keep reading: Climbing the Seven Volcanic Summits: Facts & Information
Situated on the border between Argentina and Chile, Ojos del Salado boasts two main summits, one in each country. While the summit in Chile is slightly higher, there is no appreciable difference in elevation between the two.
As a result, the mountain can be climbed from either side. The route from the Chilean side starts at a higher altitude and offers more amenities while climbing from the Argentine side is slightly longer.
Challenges of climbing Ojos del Salado
While Ojos del Salado is widely considered a trekking peak, there are still many different challenges associated with making the ascent. Both the altitude and climate provide challenges while climbing.
With an elevation of 6,893 metres (22,615 fee) and prominence of 3,688 metres (12,100 feet), altitude sickness is one of the main barriers to climbing the peak. As a result, being in the proper physical condition and taking time to acclimate on the mountain are essential to successful ascents.
Due to its location on the western slopes of the Andes, Ojos del Salado is also very dry, with scorchingly hot temperatures at its base during the climbing season. However, these quickly drop to below freezing higher up on the mountain, which is also subject to high winds.
Bringing the proper clothing and layers can be the difference between having a successful ascent and turning back early.
How to get to Ojos del Salado
For climbers heading up Ojos del Salado from the Argentine side of the border, it is best to fly into Capitán Vicente Almandos Almonacid Airport (IRJ), in La Rioja, or Coronel Felipe Varela International Airport (CTC), in Catamarca. Some guides may opt to meet in one of these cities. Otherwise, it is also possible to transfer by bus to Fiambalá, a popular starting point for the climb.
From the Chilean side, it is easiest to fly into Desierto de Atacama Airport (CPO) in Copiapó. Most guides will opt to meet here and provide transport to the start of the trip.
Routes to the summit of Ojos del Salado
Overall, three main routes lead to the summit of Ojos del Salado. Two of these start from the Argentine side of the peak, while one climbs from the Chilean side.
Of the routes, the easiest and most popular one is the normal route on the Chilean side of the border. After driving to the Refugio Atacama at 5,200 metres (17,000 feet), the ascent is a reasonably straightforward hike up the side of the mountain, cutting diagonally across one of its slopes toward the summit.
The final bit of the ascent is the only tricky part and requires some previous scrambling experience. The combination of altitude and winds makes the scrambling more challenging than it would otherwise be closer to sea level.
The Ruta Varsoviana is the most commonly taken route from the Argentine side and is known locally as the normal route. Starting from El Arenal, climbers will make a steep, semi-scrambling ascent up the mountain’s southern side until arriving at a saddle.
From the saddle, some steeper and more challenging scrambling along a ridgeline is required before arriving at the base of the summit pyramid and making one last scrambling ascent to the summit.
The Mike Dorse Direct route is the third one that leads up the peak and is also the toughest. Starting from the same point as the Ruta Varsoviana, the Mike Dorse Direct route begins with a similar approach before veering off to the left and making a steep ice climbing ascent of the peak’s glacier.
After arriving at the top of the glacier, climbers follow the same ridgeline as the Ruta Varsoviana to the summit pyramid and then to the top.
Quick facts:
- Location: Argentina, Chile
- Elevation: 6,893 m (22,615 ft)
- Duration: 2 weeks
- Climbing season: December to March
3| Nevado Illimani
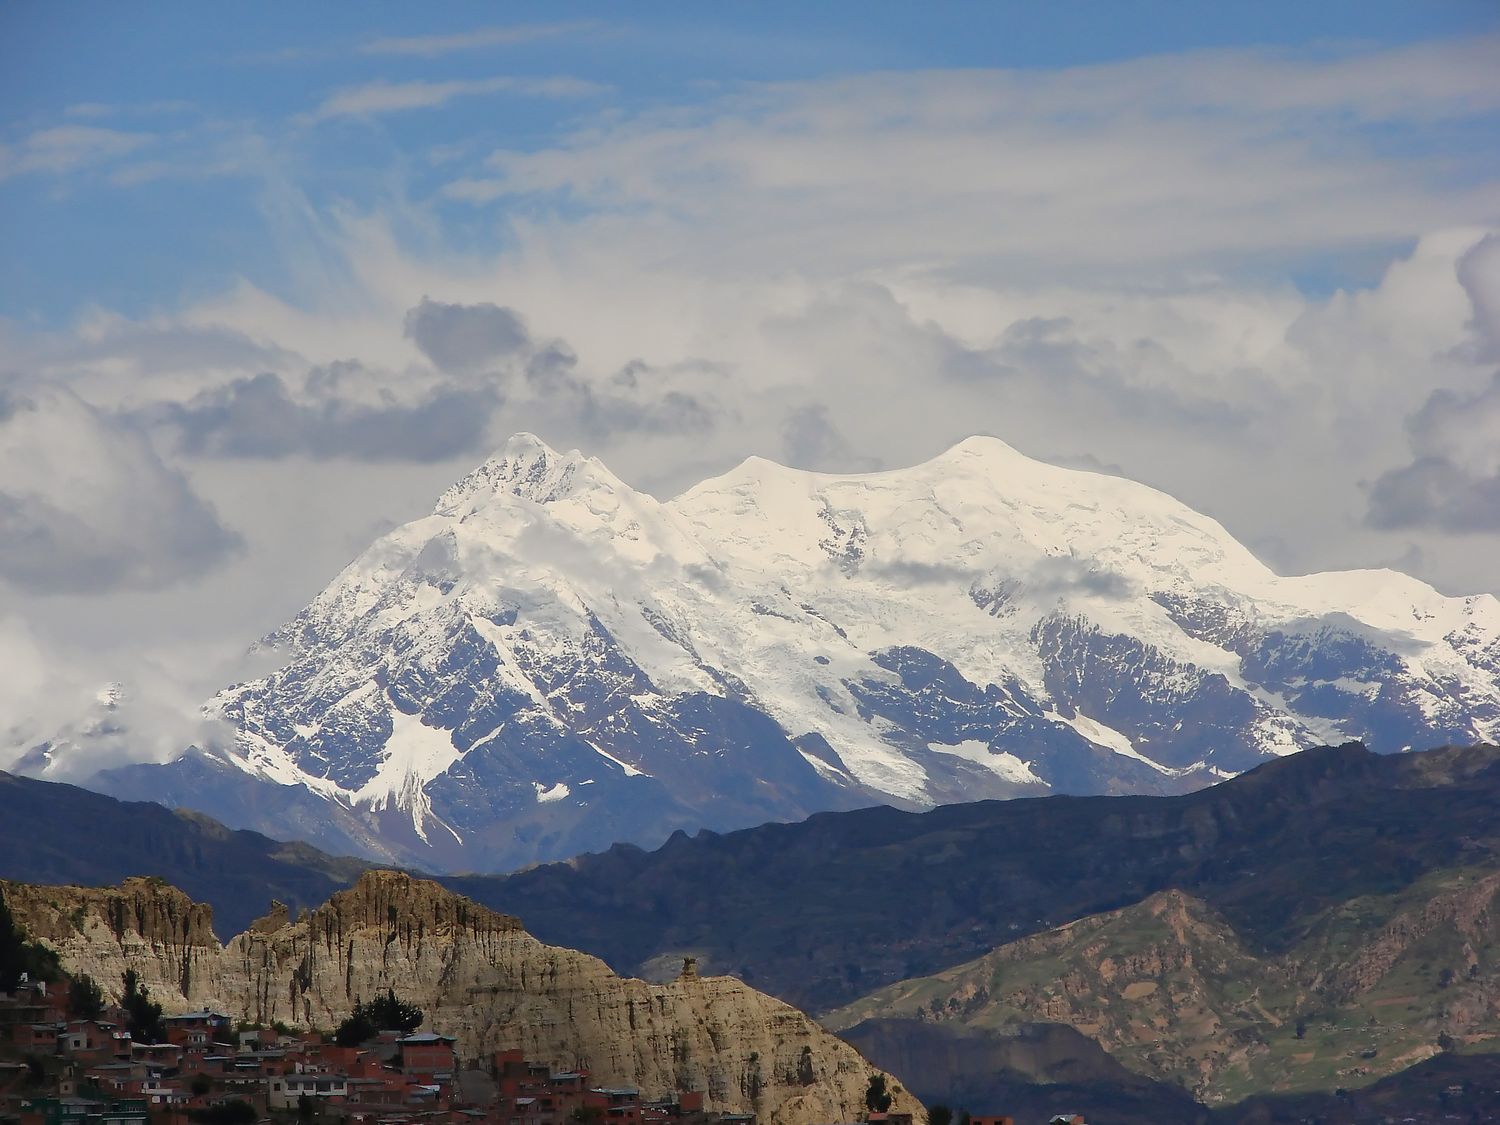
Situated on the eastern edge of the altiplano, not far from the capital of La Paz, Nevado Illimani is the second-highest mountain in Bolivia and one of its most popular mountaineering destinations.
Towering above the rest of the Cordillera Real, on the western slopes of the Bolivian Andes, the massif can be seen from La Paz and has become a cultural landmark of the country.
Illimani is composed of four main summits. The highest of these is the southern summit – Pico Sur – which rises to 6,438 metres (21,122 feet) in elevation. Pico del Indio (6,109 metres/20,042 feet), Pico Norte (6,403 metres/21,007 feet) and Pico Central (6,362 metres/20,873 feet) are the other three.
While most climbers choose only to climb Pico Sur, it is also possible to traverse the entire summit and climb all four peaks over the course of a very long day.
Challenges of climbing Nevado Illimani
The normal route up to the Pico Sur of Illimani is rated as a Class III climb and requires intermediate-level glacier and ice climbing abilities. Other routes up the various other minor summits on the massif range in difficulty from Class II to Class V and include rock, snow and ice climbing.
Away from the technical difficulties required to climb Illimani, summiting the massif presents various other challenges. Chief among these are the high altitude and the physical challenges of climbing the peak.
With an elevation of more than 6,400 metres (21,100 feet) and a prominence of 2,450 metres (8,000 feet), acclimating properly is key to successfully climbing Illimani.
Many guides recommend climbers coming from sea level to spend a few days in La Paz adjusting to the altitude. Others offer smaller hikes before the ascent for climbers to get used to the thin air.
Along with acclimating correctly, it is also essential to be in excellent physical condition before the climb. The vast majority of the routes include long and steep ascents over the glacier, with few places to stop and rest before arriving at the plateau beneath the main summit.
How to get to Nevado Illimani
Located just under 40 kilometres east-southeast of La Paz, most expeditions to Illimani begin with a flight into El Alto International Airport (LPB). Most guides will opt to meet in La Paz and provide transport to the start of the trip.
Routes to the summit of Nevado Illimani
Overall, there is one main route used by climbers heading to Pico Sur on Illimani. Meanwhile, a variety of other routes lead up to the minor summits of the massif.
The Illimani normal route, as it is widely known, begins with a steep and rugged trekking ascent from a traditional Aymara village at the foot of the mountain to the base camp. Situated at about 4,600 metres (15,000 feet), the camp boasts incredible views back toward La Paz and Lake Titicaca.
From here, climbers will continue making a steep ascent over a scree field, rock ridge and past snowy benches until arriving at the high camp, Nido de Cóndores (the condor’s nest) at 5,400 metres (18,000 feet).
The following day is summit day and begins with an ascent onto the glacier. From here, it is a steep (40º) climb up an ice slope. Once atop the slope, climbers will traverse a snowfield filled with crevasses, none of which are overly difficult to climb around or over.
Finally, climbers arrive at a plateau just beneath the four summits of the massif and follow the long summit ridge in a southern direction to arrive at the top of Pico Sur.
Quick facts:
- Location: Bolivia
- Elevation: 6,438 m (21,122 ft)
- Duration: 4 to 5 days
- Climbing season: May to October
4| Ausangate
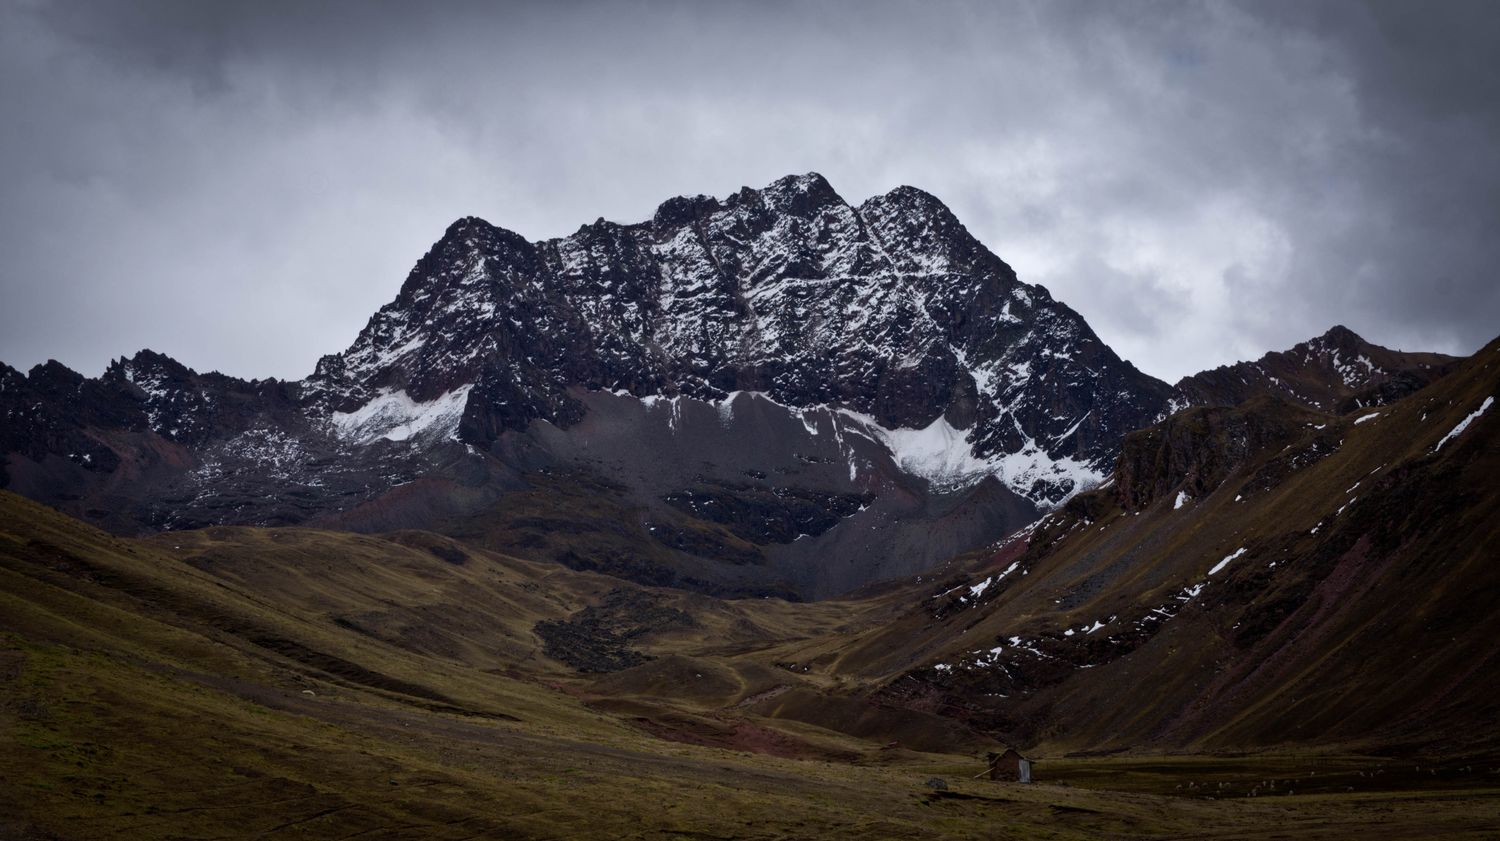
Towering above the surrounding peaks in the Cordillera Vilcanota, a subrange of the mighty Andes Mountains, Ausangate is the fifth tallest mountain in Peru.
Located roughly 100 kilometres (60 miles) southeast of the popular tourist destination of Cusco, the dark granite massif is one of the most popular mountaineering and trekking destinations around the city.
Keep reading: Top 5 Peru Mountaineering and Trekking Destinations
With a comparatively modest prominence of 2,000 metres (6,600 feet), the peak is commonly climbed from the long and sloping eastern ridgeline, which is popular among intermediate mountaineers.
However, most visitors come to the mountain to take on the 70-kilometre (45-mile) trekking route that circumnavigates the peak. Many climbers opt to start their ascent by trekking the first portion of the trail before veering off toward the mountain.
Challenges of climbing Ausangate
Overall, the ascent of Ausangate is not overly technical, though it does require some intermediate-level scrambling, snow and ice climbing to reach the summit.
Despite the lack of technical difficulty, however, there are several challenges associated with climbing Ausangate. Chief among these is the physical difficulty and altitude.
In terms of altitude, most of the ascent takes place from 4,500 metres (14,800 feet) to 6,400 metres (21,000 feet) above sea level. As a result, it is essential to be appropriately acclimated before taking on the ascent.
Most guides recommend spending a few days in Cusco and doing some local hikes to prepare for an ascent of Ausangate.
Away from the altitude, the climb is physically challenging. The majority of the climb takes place on exposed ridgelines over rugged terrain. Climbers should be prepared to steadily ascend for hours at a time with few places available to stop and rest.
The weather can also be unpredictable on the peak, with clouds enshrouding the mountain and often and creating near-whiteout conditions. This can be especially dangerous on the exposed parts of the ridge.
How to get to Ausangate
Most trips to Ausangate begin with a flight into Alejandro Velasco Astete International Airport (CUZ) in Cusco. Most guides opt to meet here and arrange transport to the start of the trip.
Routes to the summit of Ausangate
To climb Ausangate, there is one main route – the normal route – which follows the massif’s eastern ridge.
From the mountain’s high camp (5,450 metres/17,880 feet), climbers will begin the ascent by trekking uphill to the nearby glacier and climbing up onto it. Climbers proceed to make a fairly steep ascent of the glacier (55º to 60º), traversing the various crevasses en route until arriving at a seven-metre (23-foot) ice wall.
After climbing the wall, participants are now on the main ridge and can follow this, which is easier said than done. The ridge is quite steep in parts and, depending on the snow cover, requires a mix of rock and snow climbing. After traversing the ridge, climbers arrive at the plateau beneath the summit.
From here, the terrain becomes less steep and the climbing a bit easier. After navigating one last crevasse, climbers can follow the summit ridge up to the top.
Quick facts:
- Location: Peru
- Elevation: 6,384 m (20,945 ft)
- Duration: 5 to 8 days
- Climbing season: May to September
5| Chimborazo
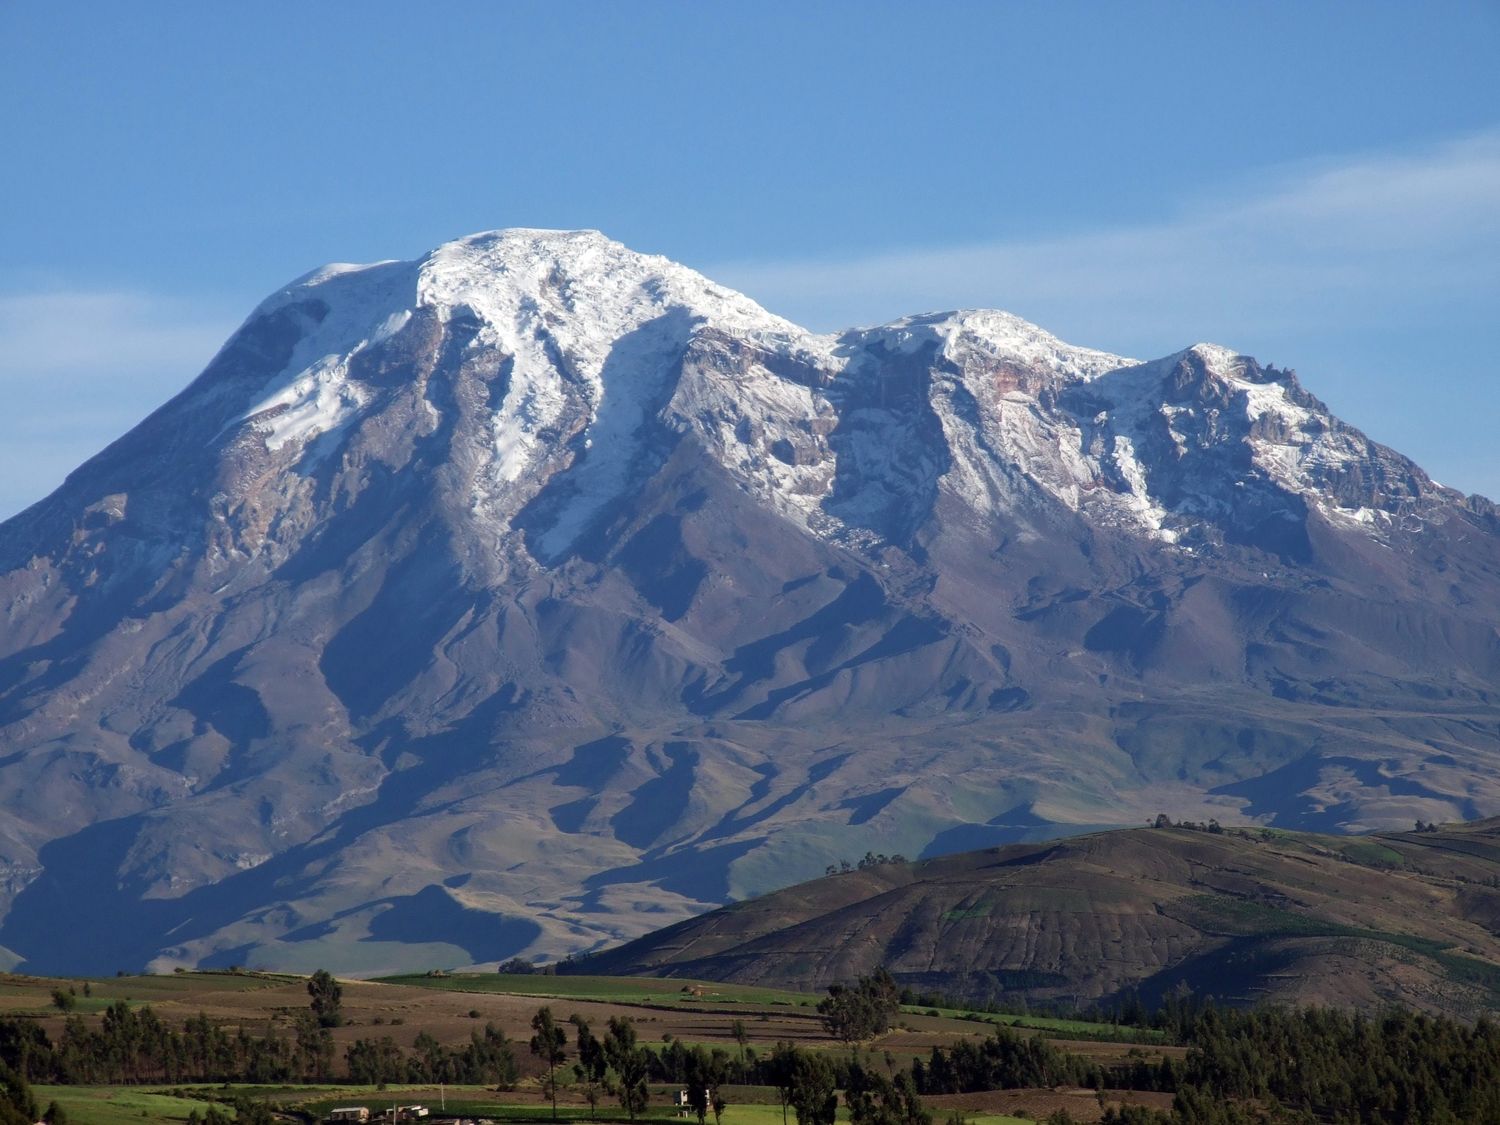
Situated at the southwestern edge of La Avenida de los Volcanes and rising to more than 6,000 metres (19,700 feet) in elevation, Chimborazo is Ecuador’s highest peak and, as a result, its most popular mountaineering destination.
While the inactive stratovolcano is far from the tallest mountain on Earth, its summit is the farthest point from the centre of the Earth due to the planet’s spheroidal shape.
Along with being the tallest mountain in the country, Chimborazo also boasts one of the largest glaciers found near the equator. Despite its immense height, climbing to the summit via the easiest route is relatively straightforward and only requires intermediate-level glacier climbing abilities.
This makes it a popular destination for mountaineers seeking to get some high elevation experience before moving on to more challenging climbs, such as Aconcagua, Denali or ascents in the Himalayas.
Challenges of climbing Chimborazo
The most accessible routes used to climb Chimborazo are not technically challenging, but the ascent still presents plenty of other challenges. The high elevation of the volcano combined with the physical requirements are among the most difficult aspects of the climb.
More challenging routes also require more advanced snow, rock and ice climbing abilities, depending on which ones are taken.
Regardless of the route that is taken, acclimatising properly is the first main challenge. The base of the peak and summit are separated by 4,118 metres (13,510 feet), making Chimborazo the eighteenth most prominent mountain in the world.
Most guides recommend that climbers coming from sea level spend a few days in Quito, the national capital, or Riobamba, which allows them to adjust to the altitude before heading to the peak. Many climbers also opt to climb one of Ecuador’s smaller volcanoes, such as Illiniza Sur, to acclimate before heading to Chimborazo.
Once on the peak, the most challenging aspect of the climb is the physical part. On the easiest route, summit day requires eight to nine hours of sustained and steep hiking and glacier trekking, with few places to stop and rest.
How to get to Chimborazo
Located just 150 kilometres (93 miles) southwest of Quito, most trips to Chimborazo begin with a flight into Mariscal Sucre International Airport (UIO). Most guides opt to meet here and provide transport to the start of the trip via the incredibly scenic Pan-American Highway.
Otherwise, it is also possible to fly into Chimborazo Airport (SERB) and hire transport to the foot of the mountain.
Routes to the summit of Chimborazo
Overall, seven different routes lead up to the summit of Chimborazo. Of these, El Castillo is the easiest and most popular route to the summit.
After arriving at the trailhead on the western side of the peak, the ascent begins with a straightforward hike to the Whymper Hut. The following day (around midnight), climbers start the summit push by hiking up to a saddle on the northern side of the volcano before climbing onto a glacial ridge.
The ridge can then be followed up to the Veintimilla summit, which is the main stopping point for climbers despite being a few metres below the true summit (known as the Whymper summit).
More advanced mountaineers looking for a challenge may also opt to climb Las Murallas Rojas or the Thielman Glacier route, both of which require more technical ice climbing to achieve.
Some routes lead up the west face and southwest ridge of Chimborazo, but these are taken far less frequently and require more technical climbing abilities.
The most challenging route to the summit is the Arista del Sol route on the mountain’s eastern side. Climbing Arista del Sol requires a high level of rock climbing abilities before arriving on the glacier and making the steep and technical ascent to the summit.
Quick facts:
- Location: Ecuador
- Elevation: 6,263 m (20,549 ft)
- Duration: 2 days
- Climbing season: December to February, June to September
6| Alpamayo
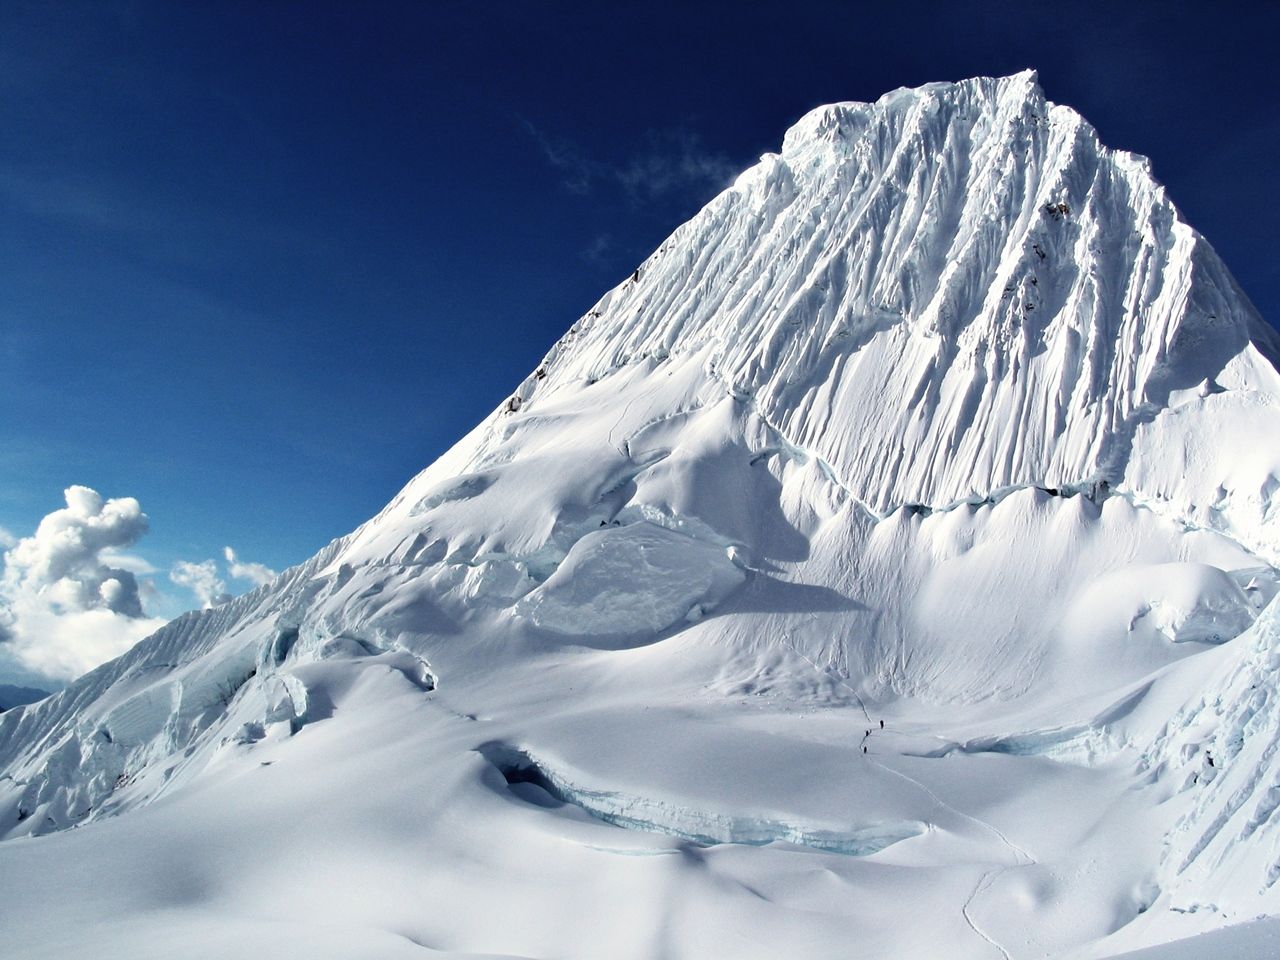
Situated in the northern reaches of central Peru’s Cordillera Blanca, Alpamayo is one of the most distinctive peaks in the Andes and is also considered one of the world’s most beautiful mountains.
Part of what makes the peak stand out is its pyramidal shape and the massive ice walls leading up to its summit. As a result, Alpamayo is one of Peru’s most popular climbing destinations and tends to get quite crowded during the climbing season.
While the peak is a popular target for mountaineers, the climb is incredibly technical and many climbers fail to reach the summit. As a result, less experienced adventurers tend to stick with a visit to Alpamayo’s base camp, which is one of the highlights of the classic Santa Cruz trek.
Challenges of climbing Alpamayo
Alpamayo has a thoroughly deserved reputation as one of the most challenging mountains to climb in South America. The challenges of arriving at its summit include the weather, altitude and technical difficulty.
Even the easiest route requires a high level of snow and ice climbing abilities and includes steep multi-pitch ascents with angles as high as 45º.
Away from the technical difficulties, climbing Alpamayo also presents a physical challenge. On summit day, climbers will need to ascend for consecutive hours with few places to stop and rest.
The route to the top is also quite exposed, which leaves climbers vulnerable to the frequently cloudy weather. However, rain and storms are not very common during the climbing season.
How to get to Alpamayo
The vast majority of trips to Alpamayo will begin with a flight into Jorge Chavez International Airport (LIM) in Lima. From here, it is possible to take an eight-hour bus north to the city of Huaraz. Most guides will opt to meet in the city and provide transport to the start of the climb.
Routes to the summit of Alpamayo
About eight routes lead up to the summit of Alpamayo, of which two are most commonly used as they are the safest and most accessible.
The Ferari route is the most popular of these two and climbs up the southwestern face of the mountain. The ascent is rated as a Class III//IV climb and involves climbing up nine different pitches, with the steepness ranging from 45º to 55º. The roundtrip takes about five to seven hours.
The French direct route is the second most popular one, despite being slightly easier than the Ferari route. Rated as a Class IV/V ice climbing ascent, the route begins by climbing the bergschrund on the southern side of the peak. The climb involves 10 steep pitches up snow and ice with an average gradient of 55º to 65º. Overall, the route takes between six to eight hours.
Quick facts:
- Location: Peru
- Elevation: 5,947 m (19,511 ft)
- Duration: 6 to 10 days
- Climbing season: May to September
7| Cotopaxi
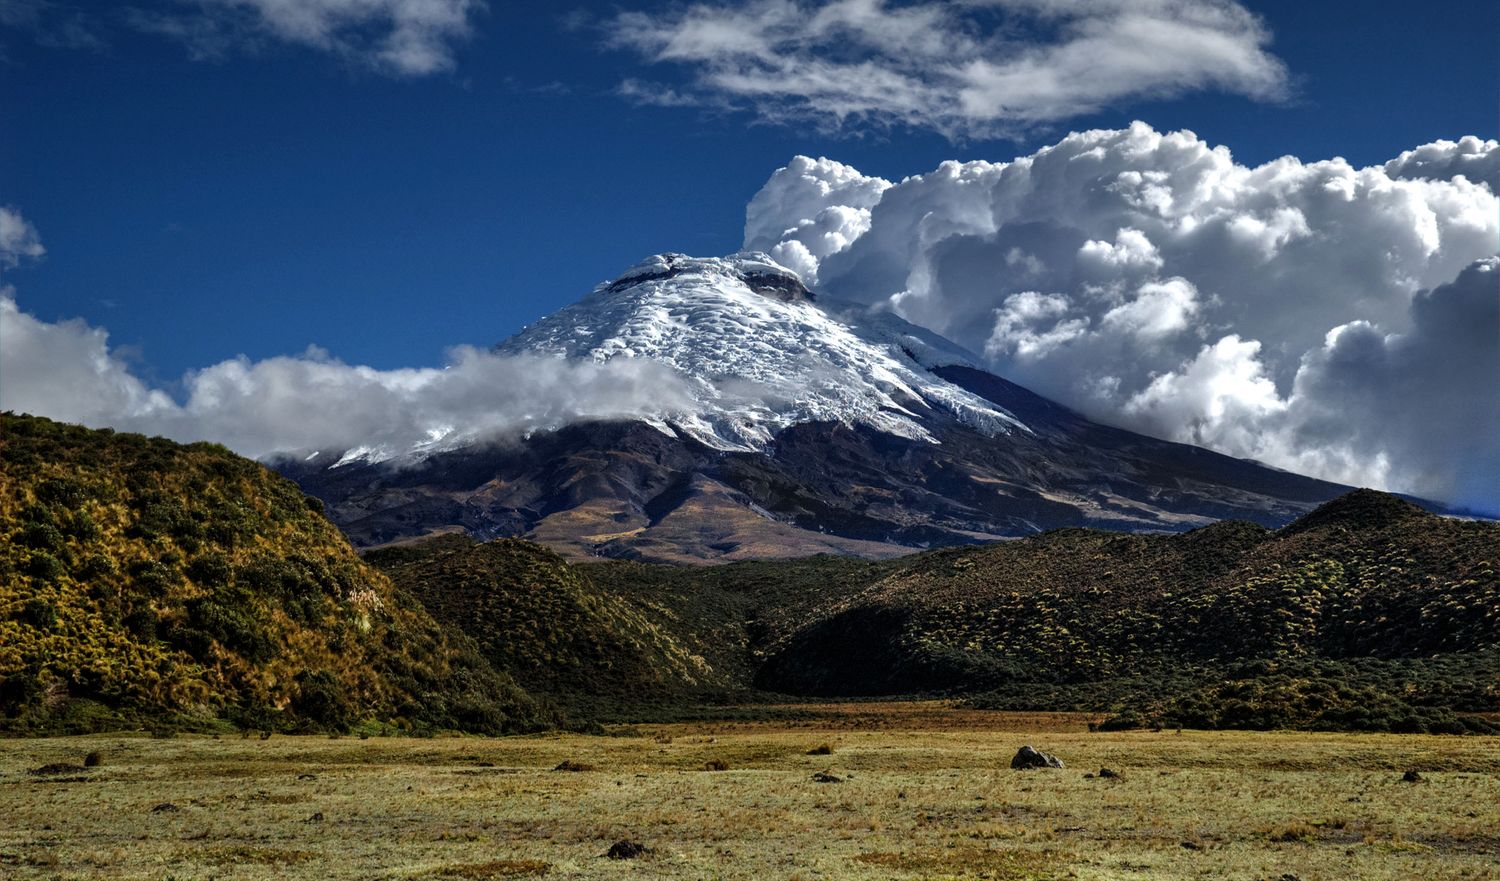
Situated in the heart of La Avenida de los Volcanes, roughly 50 kilometres (30 miles) south of Quito, Cotopaxi is the second-highest peak in Ecuador and the third tallest active volcano on Earth.
Due to the peak’s proximity to the capital and the relatively low level of technical abilities required to climb, Cotopaxi is one of the most popular mountaineering destinations in the country. During high season weekends, as many as 100 people attempt to reach the summit.
Cotopaxi’s volcanic cone is steep but symmetrical, making ascents possible from multiple different starting points around the mountain. However, the volcanic crater at the top of the mountain is irregularly shaped and consists of two concentric rings. The highest point on the volcano is the northern rim, making it the most popular destination for climbers.
Unlike many neighbouring volcanic peaks, Cotopaxi is quite active and has erupted more than 50 times in the previous 300 years. The most recent eruption took place in 2016. As a result, the slopes are covered in loose volcanic scree, which is one of the main challenges of climbing the peak.
Challenges of climbing Cotopaxi
While the two main routes that lead up to the summit of Cotopaxi do not require much technical climbing abilities – both routes are rated as Class II climbs – there are several other challenges associated with climbing the volcanic peak.
One of these is altitude. With an elevation of 5,897 metres (19,347 feet) and a prominence of 2,500 metres (8,202 feet), acclimatising properly is essential. Most guides recommend staying a few days in Quito before making the ascent or heading on a shorter acclimatisation hike up one of the country’s smaller peaks.
Away from the altitude, climbing Cotopaxi also presents a highly physical challenge. Once climbers arrive at the glacier, they should expect to steadily and steeply ascend for three to four hours without taking a break. Overall, the ascent requires about seven to nine hours of climbing.
How to get to Cotopaxi
Due to its proximity to Quito, most trips to Cotopaxi begin with a flight into Mariscal Sucre International Airport (UIO). Most guides opt to meet here and provide transport to the start of the trip. However, it is also possible to fly into Cotopaxi International Airport (LTX) in Latacunga and hire private transport to the start of the ascent.
Routes to the summit of Cotopaxi
Rompe Corazones, on the north face of the volcano, and the Southwest route are the two main trails that lead to the summit of Cotopaxi.
The Rompe Corazones (which translates to ‘broken hearts’) route is the most popular, as it passes by the only working hut on the volcano. The route itself winds up a series of switchbacks and over the volcanic scree before climbing onto the glacier and ascending to the volcano’s northern rim.
The Southwest route requires some slightly more technical glacier and ice climbing. It also requires climbers to camp on the slopes of the mountain. Since the northern rim is the highest point on the volcano, the route is also slightly longer and more physically taxing.
Quick facts:
- Location: Ecuador
- Elevation: 5,897 m (19,347 ft)
- Duration: 2 days
- Climbing season: June to August, December to January
8| Cayambe
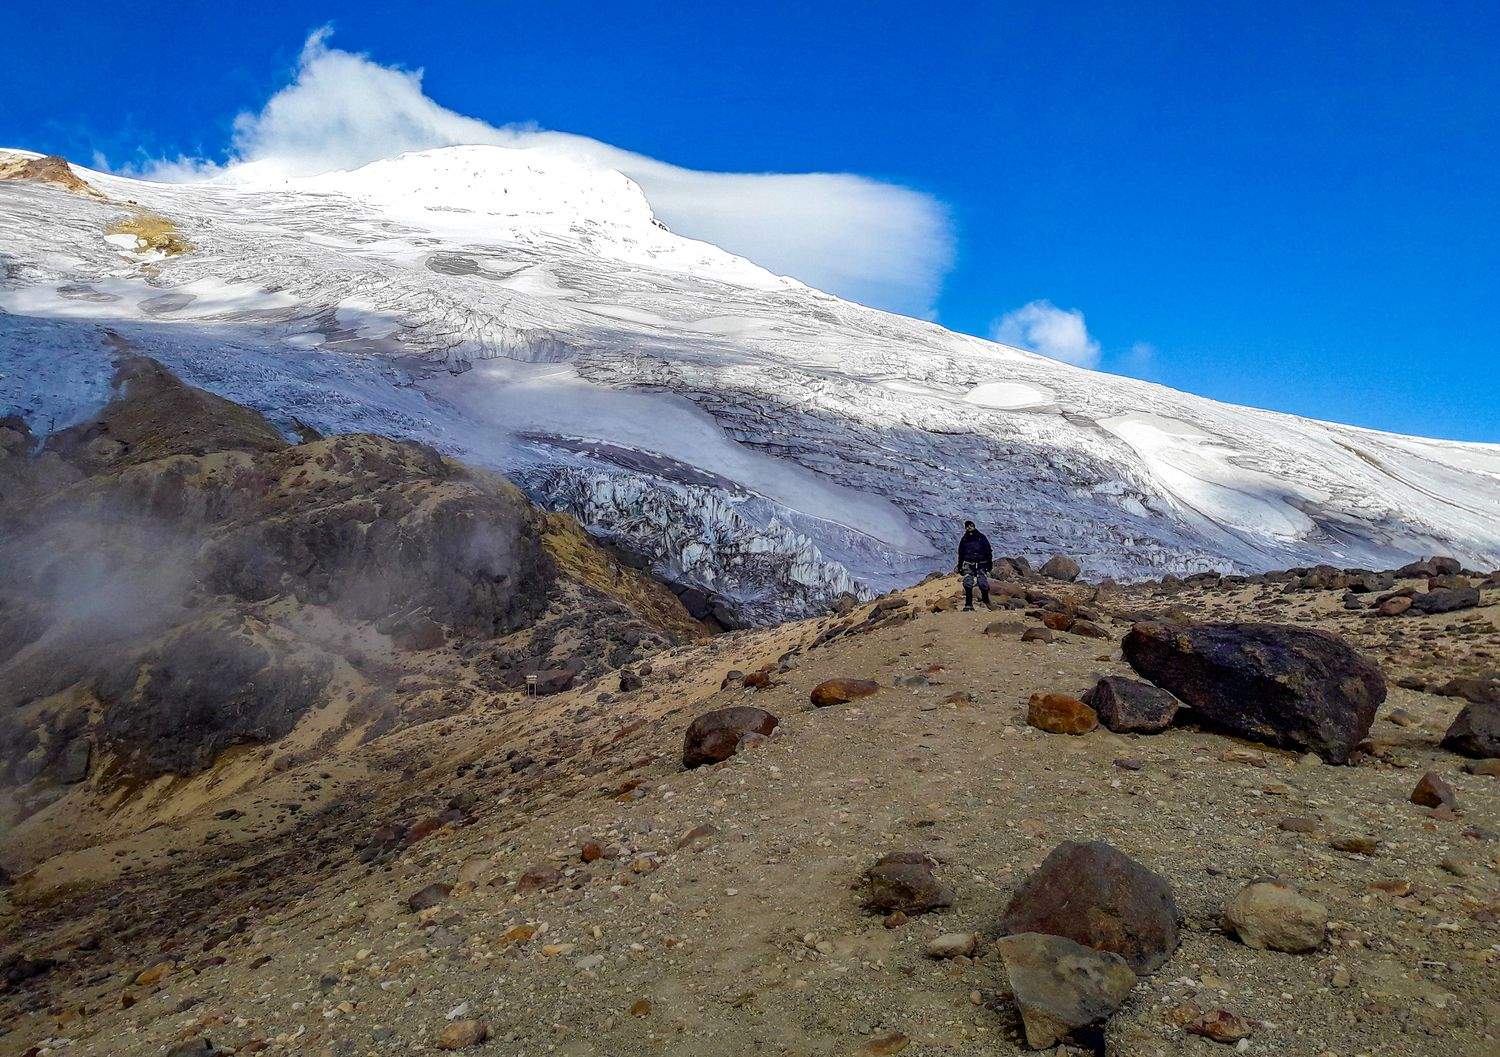
Situated at the northern end of Ecuador’s famed Avenida de los Volcanes, Cayambe is the third tallest mountain in the country and one of its most popular mountaineering destinations.
The potentially active compound volcano can be easily reached from Quito and is often combined with expeditions to nearby Chimborazo and Cotopaxi.
Part of what makes Cayambe such a popular destination for mountaineers is the low technical ability required to reach its summit. As a result, it is frequently climbed by novice and first-time mountaineers.
Keep reading: The Basics of Glacier Travel: Top Tips and Tricks
Cayambe also makes for a popular destination due to its unique location on the equator. It is the tallest mountain located on the imaginary line and the only point on the equator covered in snow.
Challenges of climbing Cayambe
While climbing Cayambe requires only basic scrambling and glacier climbing techniques, there are plenty of other challenges associated with making an ascent of the peak.
The altitude and physical demands of climbing the volcano are chief among these. Reaching an elevation of 5,790 metres (18,996 feet) and with 2,075 metres (6,808 feet) of prominence, acclimating properly is key to making a successful ascent of the peak.
While some climbers opt to spend an extra day on the peak – usually learning or practicing the necessary glacier climbing skills – others who have spent a few days acclimating in Quito can head straight to the summit.
Away from the elevation, climbing Cayambe requires a high level of physical fitness. Summit day requires six to eight hours of ascending the glacier followed by another three to four hours descending. Participants should expect to climb for hours at a time with limited opportunities to stop and rest.
How to get to Cayambe
Cayambe is located about 60 kilometres (37 miles) northeast of Quito. As a result, most expeditions to the summit of the peak begin with a flight into Mariscal Sucre International Airport (UIO).
Most guides will opt to meet here and provide transport to the start of the trip. However, it is also possible to take a bus to the town of Cayambe and hire private transport to the foot of the mountain.
Routes to the summit of Cayambe
There is one main route – known as the standard route – that is used to climb Cayambe.
Starting from the trailhead, climbers will make a 45-minute hike to the Ruales Oleas Berge Refuge, the only hut on the mountain. Most guides will opt to continue hiking up the steep slopes of the volcano to acclimatise better.
The following day, climbers will start the ascent to the summit at about midnight. The climb begins with a steep hike over rugged terrain to the top of the volcano’s buttress. From here, the crampons and ice axes come out and the rest of the ascent is spent winding around the numerous crevasses of the glacier.
At about 5,500 metres (18,000 feet), climbers arrive at the final bergschrund. Once this has been traversed, it is a straight shot up to the summit.
Quick facts:
- Location: Ecuador
- Elevation: 5,790 m (18,996 ft)
- Duration: 2 days
- Climbing season: June to August, December to January
9| Nevado Pisco
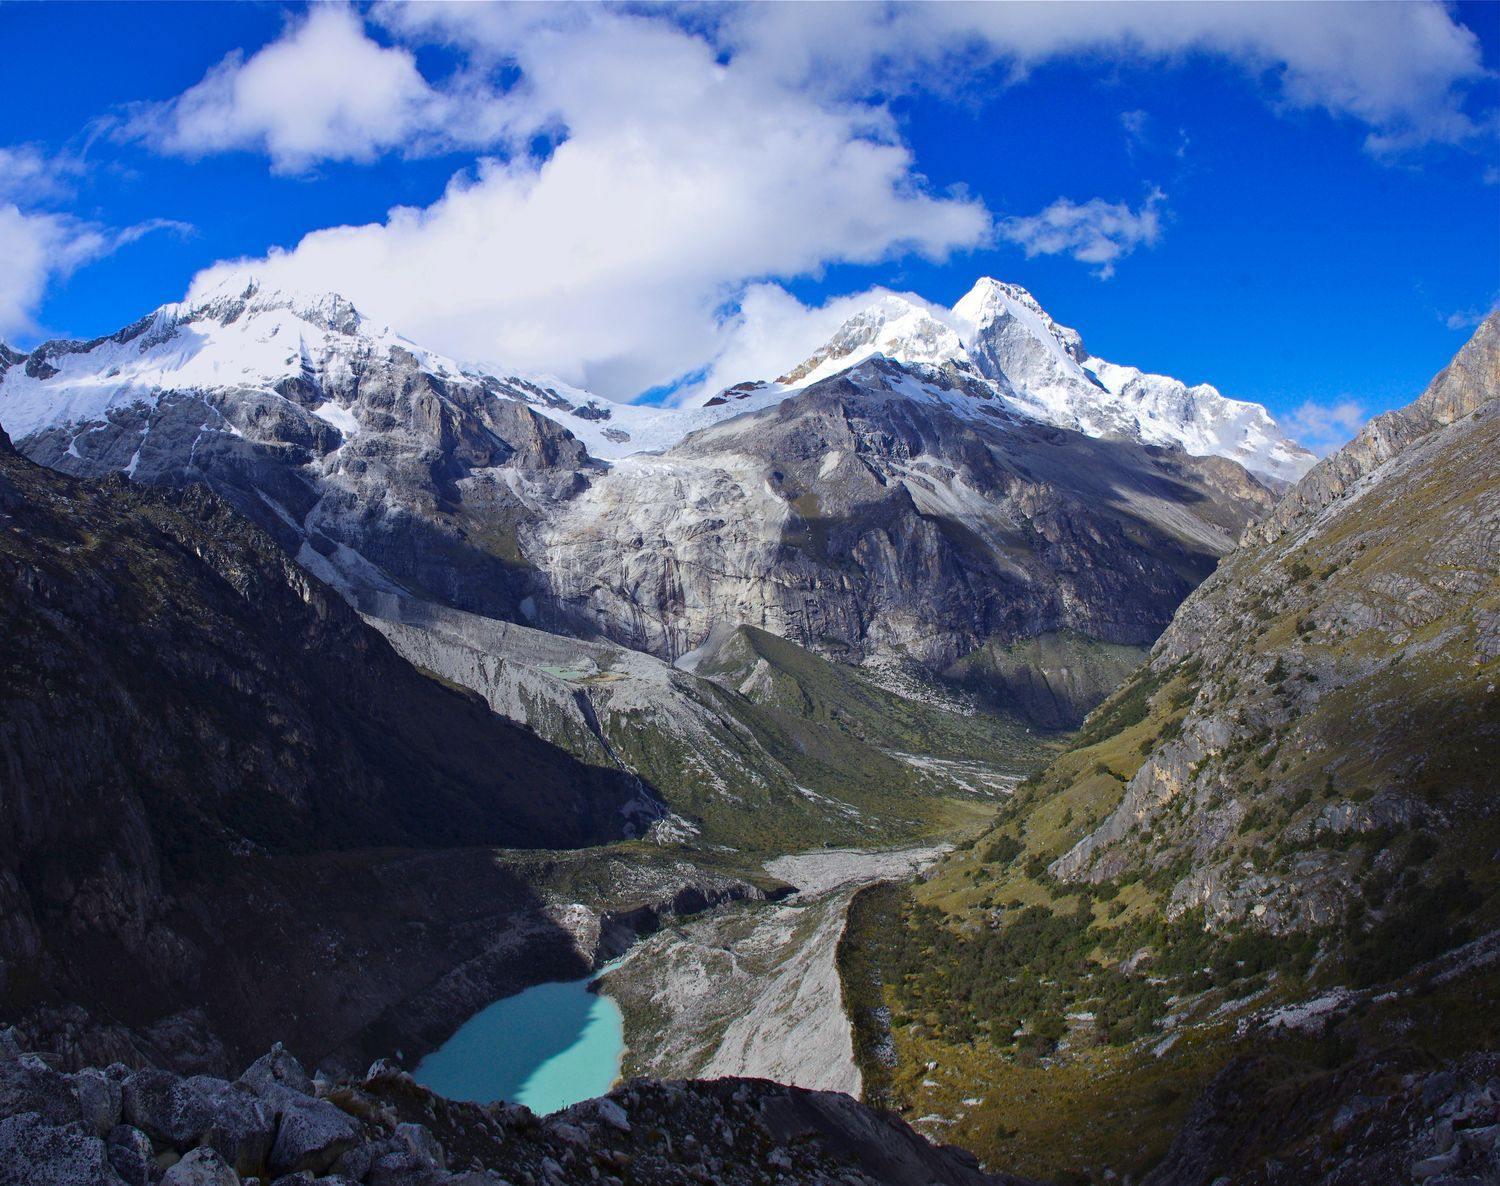
Standing tall among the snow-capped peaks of the Cordillera Blanca, Nevado Pisco is one of Peru’s most popular mountaineering destinations.
Named after the national distilled spirit, a potent cultural symbol, Nevado Pisco is divided into Pico Oeste (the western summit) and Pico Este (the eastern summit). Of these two, Pico Oeste is slightly taller, which makes it the target of mountain mountaineers. Pico Este is rarely climbed.
Along with the stunning views offered from the peak’s summit, Nevado Pisco is a popular destination due to its low level of technical difficulty to climb. The peak is viewed as one of the most accessible high-elevation mountains to climb in the Andes.
However, the route is becoming steadily more challenging. Climate change has gradually led to the recession of the mountain’s glacier, exposing far more difficult and more rugged rocky terrain.
Challenges of climbing Nevado Pisco
While climbing Nevado Pisco only requires some very basic glacier climbing techniques and is therefore well-suited to novice mountaineers, there are still plenty of other challenges associated with summiting the peak.
Chief among these is the altitude. The vast majority of the ascent takes place from 4,000 metres (13,100 feet) to nearly 6,000 metres (19,700 feet). Most guides recommend climbers spend time acclimatising in Huaraz before starting the expedition. Many guides also build acclimatisation time into the itinerary.
Along with proper acclimatisation, the climb also requires a very high level of physical fitness. Even the most accessible routes to the summit are quite steep. Summit day is also long and grueling, requiring hours of constant climbing at the high altitude until the summit is reached.
How to get to Nevado Pisco
Most expeditions to climb Nevado Pisco begin with a flight into Jorge Chavez International Airport (LIM) in Lima. From here, it is possible to take an eight-hour bus ride north to the city of Huaraz, where most guides opt to meet before providing transport to the start of the trip.
Routes to the summit of Nevado Pisco
While several routes lead up to the summit of Nevado Pisco, the most popular is easily the southwest ridge route.
Starting from base camp – which can be reached in a half-day of scenic trekking and sits at an elevation of 4,700 metres (15,400 feet) – climbers will hike up the peak’s glacial moraine crest before dropping down onto the toe of the glacier.
From here, climbers cross the glacier until arriving at the moraine on the other side. After climbing up this, climbers can simply follow the southwest ridge up to the summit.
Away from this route, four others lead up to the summit: the South Face (Class IV), Southeast Buttress (Class V), East Face (Class VI) and Northeast Ridge (Class V).
Each of these routes requires long and challenging stretches of multi-pitch ice climbing, with individual pitches ranging anywhere from 350 to 500 metres (1,150 to 1,650 feet) in length.
Quick facts:
- Location: Peru
- Elevation: 5,752m (18,871 ft)
- Duration: 3 days
- Climbing season: May to September
10| Lanín

Situated in the northern reaches of Patagonia, Lanín rises high above the surrounding native forests, pampas and mountains.
The cone-shaped and glaciated stratovolcano rises to more than 3,700 metres (12,000 ft) tall and towers over the border between Chile and Argentina. Due to its immense size and beauty, it has long been seen as a sacred symbol by the native Mapuche people.
This natural beauty, paired with the reasonably low technical ability required to climb the peak, has turned Lanín into an incredibly popular mountaineering destination. Some routes lead to the summit from both sides of the border, but the normal route on the Argentine side is by far the most popular.
Due to government restrictions put in place to protect the mountain’s delicate ecosystem, a maximum of 60 people are allowed to climb the peak per day.
Challenges of climbing Lanín
Despite the low level of technical ability required to climb Lanín, there are plenty of other challenges associated with climbing the volcano.
Reaching the summit of Lanín requires gaining 2,624 metres (8,609 feet) of elevation over at least two days. As a result, acclimatisation is important for a successful climb. Most guides recommend participants flying in from sea level spend a few days in the area around the mountain before making the ascent.
Climbing Lanín is also a physical challenge. On summit day, participants will spend 12 to 15 hours trekking up the side of the steep volcanic cone and through the peak’s snowcap, all while hauling the necessary gear for the expedition.
While most expeditions occur at the driest time of year on and around Lanín, the weather in Patagonia can be quite volatile, with strong winds and atoms forming quickly.
How to get to Lanín
Regardless of which route is being taken, there are a few different starting points for any ascent of Lanín.
For those who want to climb from Argentina, flying into Aviador Carlos Campos Airport (CPC), between San Martín de los Andes and Junín de los Andes is a popular starting point. Many guides will opt to meet in one of these two cities and provide transport to the start of the trip.
For climbers planning on tackling the mountain from Chile, the easiest option is to fly into Araucanía Airport (ZCO) in Temuco and transfer to Pucón. Most guides will offer transport to the start of the trip from here.
Routes to the summit of Lanín
Two main routes lead to the summit of Lanín. The normal route climbs via the northern side of the mountain and is most commonly used. Meanwhile, the south face route is far more challenging.
The northern route, located in Chile (though it is easily accessed from the aforementioned starting points in Argentina), starts with a moderate ascent that includes trekking over mixed rock and snow.
Higher up, climbers will need to take out crampons and ice axes to traverse the snowfields and reach the summit. Due to its relative ease, this route is popular with first-time mountaineers learning the basics of the sport.
Meanwhile, the south face route is far more challenging and involves technical snow, ice, rock and glacier climbing to arrive at the summit. The route is best reserved for intermediate-level mountaineers looking for a challenge.
Quick facts:
- Location: Argentina, Chile
- Elevation: 3,776 m (12,388 ft)
- Duration: 2 days
- Climbing season: December to May
Start planning your next South American adventure now!
Boasting a combination of diverse and gorgeous scenery, paired with plenty of incredible climbing, heading on a South American mountaineering expedition should be on any outdoor enthusiast’s bucket list.
With plenty of different options for climbers of every level, the perfect adventure is waiting in the Andes!